The following instructions step through the process of manually configuring your Office 365 Exchange Online account with Outlook 2010, 2013, and 2016 for Windows. This may be needed when configuring a secondary account, or if you run into issues with the automatic configuration process.
Setting up a connection to the Microsoft Exchange Server / OFFICE 365
To manually set up a connection to the Microsoft Exchange Server, proceed as follows.
- Open your Windows Control Panel.
- From the Control Panel items list, click Mail.
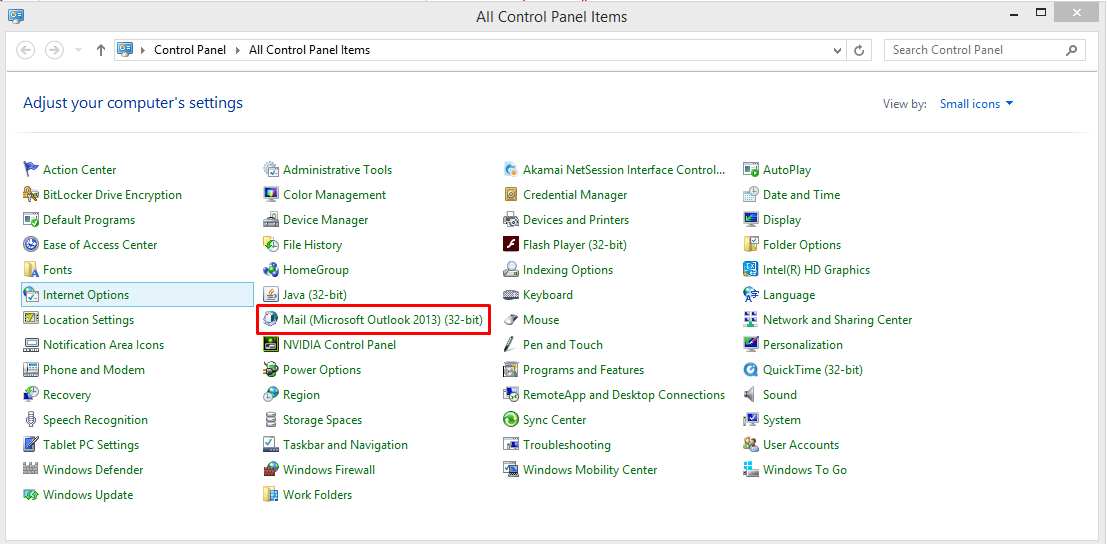
Note:
If you don't see the Mail option, change your View by setting (top right corner of Control Panel) to either Large Icons, or Small Icons.
The Mail Setup dialogue box appears.
- Click E-mail Accounts.
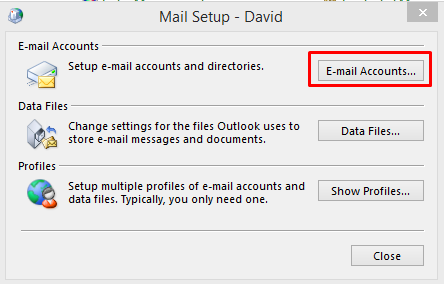
The Account Settings page opens on the E-mail tab.
- Click New.

The Add Account: Auto Account Setup page opens.
- Select the Manual setup or additional server types radio button.
- Click Next
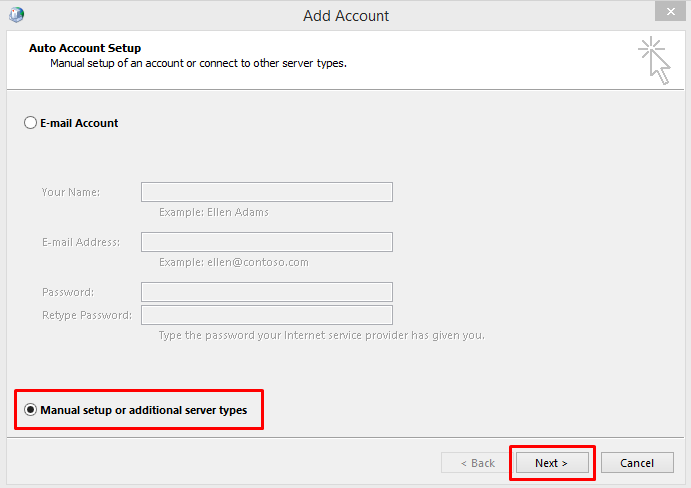
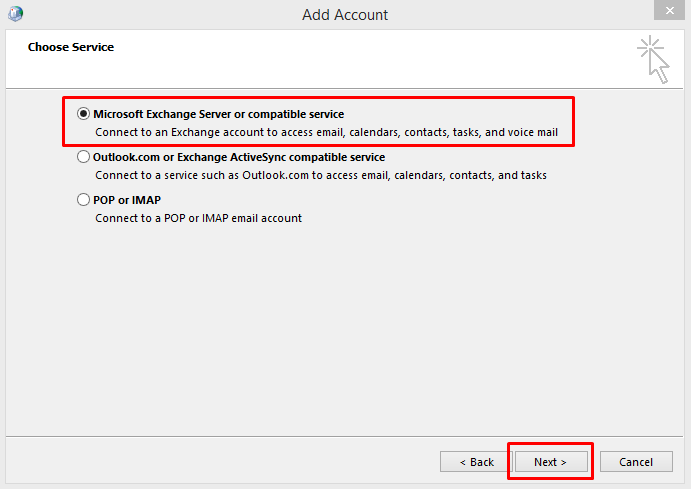
The Add Account: Choose Service page opens.
- Select the Microsoft Exchange Server or compatible service radio button.
- Click Next.
Note:
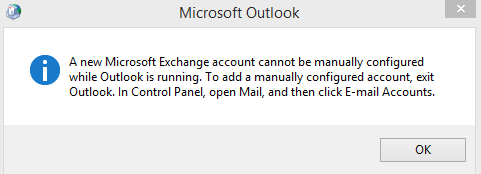
If the following window appears then Outlook has been detected running on your machine. To proceed, you must close Outlook before continuing with the procedure.
The Add Account: Server Settings page opens.
- Complete entries on this page as follows:
Caution:
DO NOT click the Check Name button in this Step. If you do then the configuration will fail.
- In the Server textbox, enter outlook.office365.com
- In the User Name textbox, enter your Office 365 user name (For example, smith@aellab.com).
- Leave Offline Settings untouched.
- Click More Settings.

The Microsoft Exchange dialogue box opens on the General tab.
The basic connection to the Microsoft Exchange Server is now configured, and you may continue to set up Security and Connection details.
Setting up security and connection details
To set up security and connection details for your new Microsoft Exchange Server connection, proceed as follows.
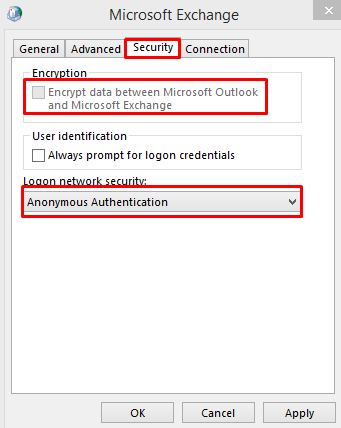
- From the Microsoft Exchange dialogue box, click the Security tab.
The Security tab opens.
- Un-tick the checkbox for Encrypt data between Microsoft Outlook and Microsoft Exchange.
- Under Logon network security, from the drop-down menu, select Anonymous Authentication.
- Click the Connection tab.
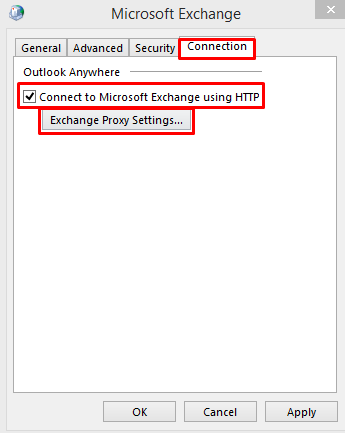
The Connection tab opens.
- Tick the checkbox for Connect to Microsoft Exchange using HTTP.
- Click Exchange Proxy Settings…
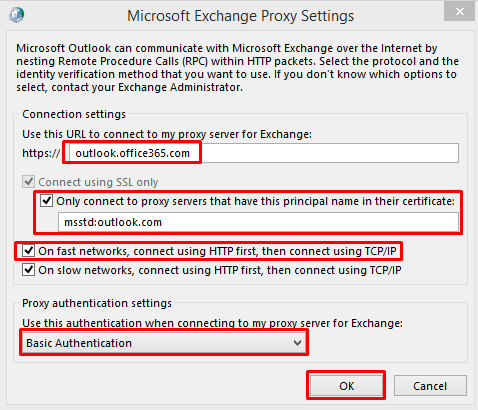
The Microsoft Exchange Proxy Settings page opens.
- Complete entries on this page as follows:
- In the Use this URL to connect to my proxy server for exchange: https://outlook.office365.com
- Tick the checkbox for Only connect to proxy servers that have this principal name in their certificate, and enter msstd:outlook.com in the associated text box.
- Tick the checkbox for On fast networks, connect using HTTP first, then connect using TCP/IP.
- Under Use this authentication when connecting to my proxy server for Exchange, from the drop-down menu, select Basic Authentication.
- Click OK.
The Microsoft Exchange dialogue box reappears, open on the Connection tab.
- Click OK.
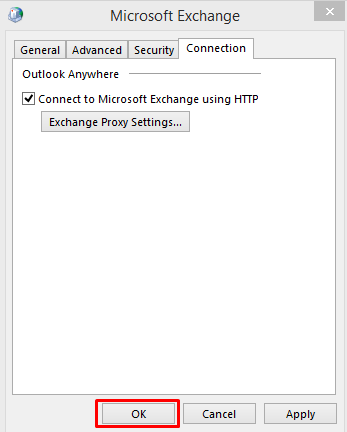
The Add Account: Server Settings page reappears.
The security and connection details have now been set up, and you can proceed to check, authenticate and finish the process.
Checking and authenticating
To check and authenticate your set up before completion, proceed as follows.
- From the Add Account: Server Settings page, click Check Name.
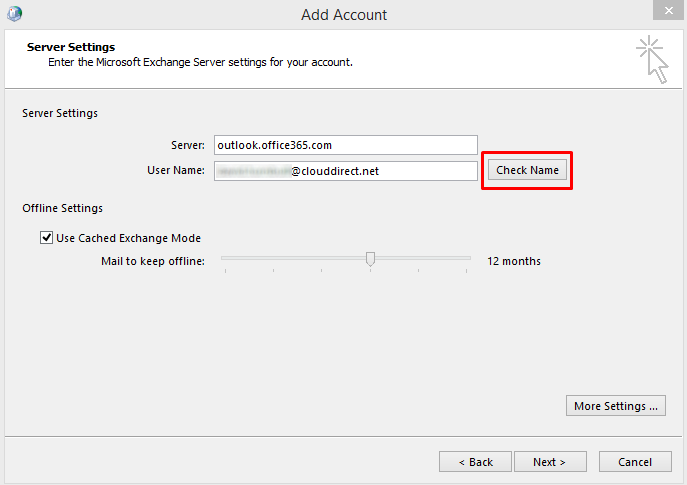
A Windows Security authentication prompt appears.
- Enter your Office 365 account user name (AEL email address) and password.
Note:
If you wish, tick the Remember my credentials checkbox to miss out this authentication step in the future.

- Click OK, to return to the Add Account: Server Settings page.
- Click Next.
Your Microsoft Exchange configuration is complete, and you are presented with the Finish page.
- Click Finish.
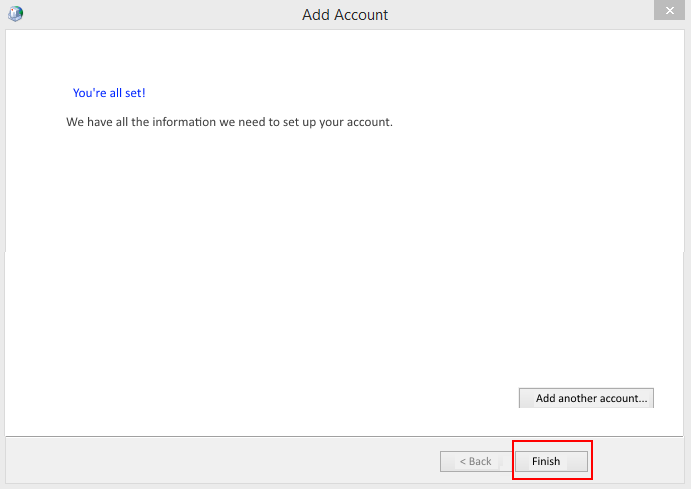
Your account will be set up and you can open Outlook to begin using your Exchange account.
